Build Your First Application
Overview
This tutorial is intended to introduce you to the CodeIgniter4 framework and the basic principles of MVC architecture. It will show you how a basic CodeIgniter application is constructed in a step-by-step fashion.
If you are not familiar with PHP, we recommend that you check out the W3Schools PHP Tutorial before continuing.
In this tutorial, you will be creating a basic news application. You will begin by writing the code that can load static pages. Next, you will create a news section that reads news items from a database. Finally, you’ll add a form to create news items in the database.
This tutorial will primarily focus on:
Model-View-Controller basics
Routing basics
Form validation
Performing basic database queries using CodeIgniter’s Model
The entire tutorial is split up over several pages, each explaining a small part of the functionality of the CodeIgniter framework. You’ll go through the following pages:
Introduction, this page, which gives you an overview of what to expect and gets your default application downloaded and running.
Static pages, which will teach you the basics of controllers, views and routing.
News section, where you’ll start using models and will be doing some basic database operations.
Create news items, which will introduce more advanced database operations and form validation.
Conclusion, which will give you some pointers on further reading and other resources.
Enjoy your exploration of the CodeIgniter framework.
Getting Up and Running
Installing CodeIgniter
You can download a release manually from the site, but for this tutorial we will use the recommended way and install the AppStarter package through Composer. From your command line type the following:
composer create-project codeigniter4/appstarter ci-news
This creates a new folder, ci-news, which contains your application code, with CodeIgniter installed in the vendor folder.
Setting Development Mode
By default, CodeIgniter starts up in production mode. This is a safety feature to keep your site a bit more secure in case settings are messed up once it is live. So first let’s fix that. Copy or rename the env file to .env. Open it up.
This file contains server-specific settings. This means you never will need to
commit any sensitive information to your version control system. It includes
some of the most common ones you want to enter already, though they are all commented
out. So uncomment the line with CI_ENVIRONMENT on it, and change production to
development:
CI_ENVIRONMENT = development
Running Development Server
With that out of the way it’s time to view your application in a browser. You can serve it through any server of your choice, Apache, nginx, etc, but CodeIgniter comes with a simple command that takes advantage of PHP’s built-in server to get you up and running fast on your development machines. Type the following on the command line from the root of your project:
php spark serve
The Welcome Page
Now point your browser to the correct URL you will be greeted by a welcome screen. Try it now by heading to the following URL:
http://localhost:8080
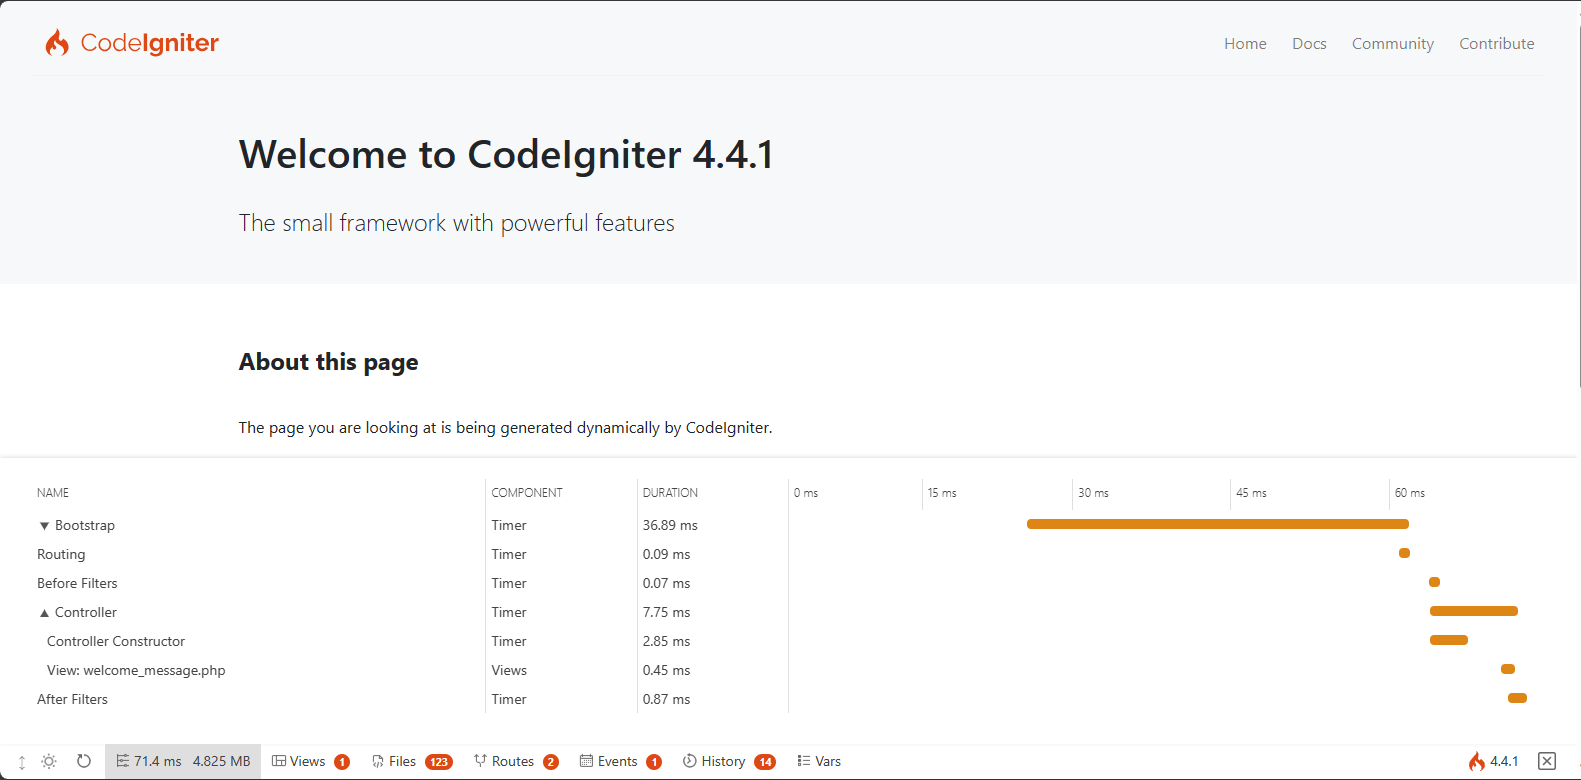
and you should be greeted by the following page:

This means that your application works and you can start making changes to it.
Debugging
Debug Toolbar
Now that you’re in development mode, you’ll see the CodeIgniter flame on the right bottom of your application. Click it and you’ll see the debug toolbar.
This toolbar contains a number of helpful items that you can reference during development. This will never show in production environments. Clicking any of the tabs along the bottom brings up additional information. Clicking the X on the right of the toolbar minimizes it to a small square with the CodeIgniter flame on it. If you click that the toolbar will show again.
Error Pages
In addition to this, CodeIgniter has some helpful error pages when you hit exceptions or other errors in your program. Open up app/Controllers/Home.php and change some line to generate an error (removing a semi-colon or brace should do the trick!). You will be greeted by a screen looking something like this:
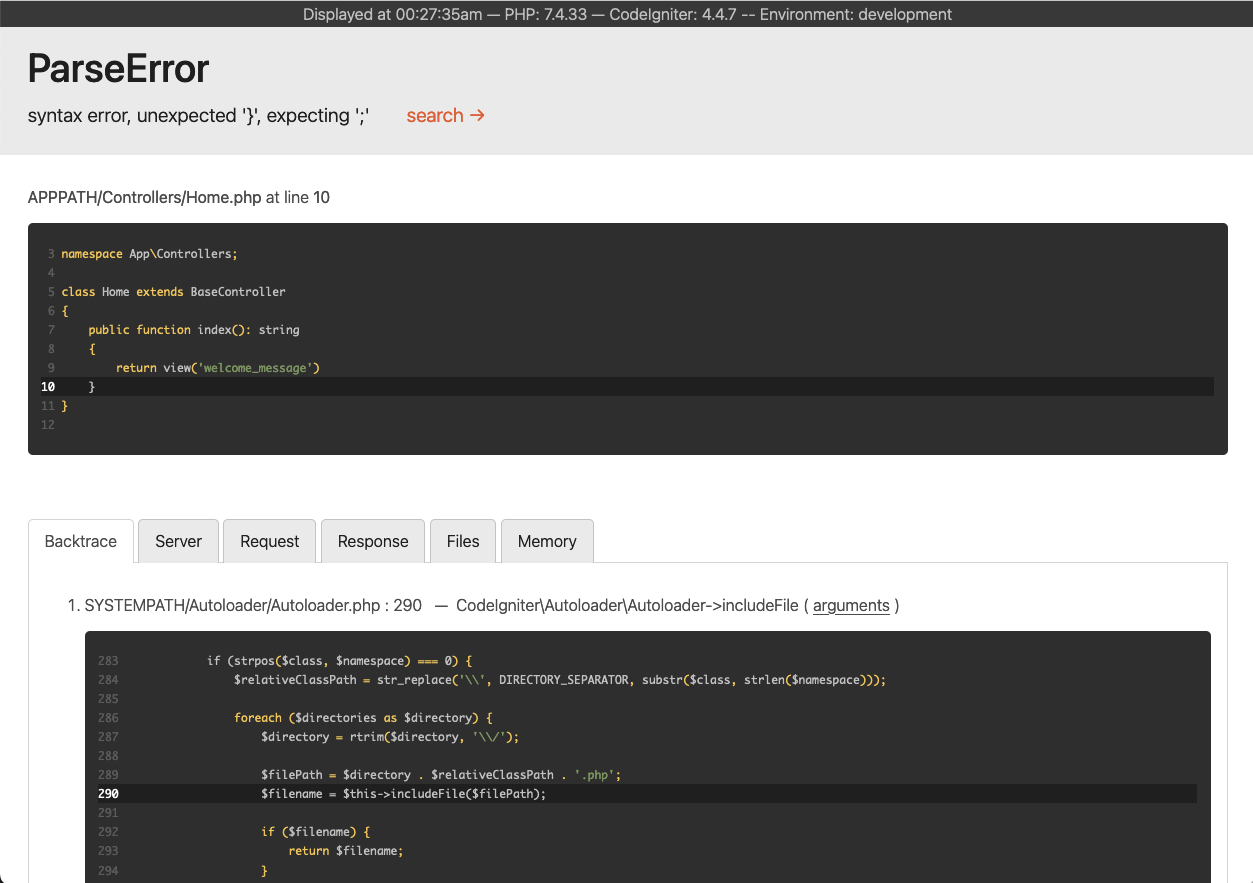
There are a couple of things to note here:
Hovering over the red header at the top reveals a search link that will open up DuckDuckGo.com in a new tab and searching for the exception.
Clicking the arguments link on any line in the Backtrace will expand a list of the arguments that were passed into that function call.
Everything else should be clear when you see it.
Now that we know how to get started and how to debug a little, let’s get started building this small news application.