News Section
In the last section, we went over some basic concepts of the framework by writing a class that references static pages. We cleaned up the URI by adding custom routing rules. Now it’s time to introduce dynamic content and start using a database.
Create a Database to Work with
The CodeIgniter installation assumes that you have set up an appropriate database, as outlined in the requirements. In this tutorial, we provide SQL code for a MySQL database, and we also assume that you have a suitable client for issuing database commands (mysql, MySQL Workbench, or phpMyAdmin).
You need to create a database ci4tutorial that can be used for this tutorial,
and then configure CodeIgniter to use it.
Using your database client, connect to your database and run the SQL command below (MySQL):
CREATE TABLE news (
    id INT UNSIGNED NOT NULL AUTO_INCREMENT,
    title VARCHAR(128) NOT NULL,
    slug VARCHAR(128) NOT NULL,
    body TEXT NOT NULL,
    PRIMARY KEY (id),
    UNIQUE slug (slug)
);
Also, add some seed records. For now, we’ll just show you the SQL statements needed to create the table, but you should be aware that this can be done programmatically once you are more familiar with CodeIgniter; you can read about Migrations and Seeds to create more useful database setups later.
A note of interest: a “slug”, in the context of web publishing, is a user- and SEO-friendly short text used in a URL to identify and describe a resource.
The seed records might be something like:
INSERT INTO news VALUES
(1,'Elvis sighted','elvis-sighted','Elvis was sighted at the Podunk internet cafe. It looked like he was writing a CodeIgniter app.'),
(2,'Say it isn\'t so!','say-it-isnt-so','Scientists conclude that some programmers have a sense of humor.'),
(3,'Caffeination, Yes!','caffeination-yes','World\'s largest coffee shop open onsite nested coffee shop for staff only.');
Connect to Your Database
The local configuration file, .env, that you created when you installed CodeIgniter, should have the database property settings uncommented and set appropriately for the database you want to use. Make sure you’ve configured your database properly as described in Database Configuration:
database.default.hostname = localhost
database.default.database = ci4tutorial
database.default.username = root
database.default.password = root
database.default.DBDriver = MySQLi
Setting up Your Model
Instead of writing database operations right in the controller, queries should be placed in a model, so they can easily be reused later. Models are the place where you retrieve, insert, and update information in your database or other data stores. They provide access to your data. You can read more about it in Using CodeIgniter’s Model.
Create NewsModel
Open up the app/Models directory and create a new file called NewsModel.php and add the following code.
<?php

namespace App\Models;

use CodeIgniter\Model;

class NewsModel extends Model
{
    protected $table = 'news';
}
This code looks similar to the controller code that was used earlier. It
creates a new model by extending CodeIgniter\Model and loads the database
library. This will make the database class available through the
$this->db object.
Add NewsModel::getNews() Method
Now that the database and a model have been set up, you’ll need a method
to get all of our posts from our database. To do this, the database
abstraction layer that is included with CodeIgniter -
Query Builder - is used in the CodeIgniter\Model. This makes it
possible to write your ‘queries’ once and make them work on all
supported database systems. The Model class
also allows you to easily work with the Query Builder and provides
some additional tools to make working with data simpler. Add the
following code to your model.
    /**
     * @param false|string $slug
     *
     * @return array|null
     */
    public function getNews($slug = false)
    {
        if ($slug === false) {
            return $this->findAll();
        }

        return $this->where(['slug' => $slug])->first();
    }
With this code, you can perform two different queries. You can get all
news records, or get a news item by its slug. You might have
noticed that the $slug variable wasn’t escaped before running the
query; Query Builder does this for you.
The two methods used here, findAll() and first(), are provided
by the CodeIgniter\Model class. They already know the table to use based on the $table
property we set in NewsModel class, earlier. They are helper methods
that use the Query Builder to run their commands on the current table, and
returning an array of results in the format of your choice. In this example,
findAll() returns an array of array.
Display the News
Now that the queries are written, the model should be tied to the views
that are going to display the news items to the user. This could be done
in our Pages controller created earlier, but for the sake of clarity,
a new News controller is defined.
Adding Routing Rules
Modify your app/Config/Routes.php file, so it looks as follows:
<?php

// ...

use App\Controllers\News; // Add this line
use App\Controllers\Pages;

$routes->get('news', [News::class, 'index']);           // Add this line
$routes->get('news/(:segment)', [News::class, 'show']); // Add this line

$routes->get('pages', [Pages::class, 'index']);
$routes->get('(:segment)', [Pages::class, 'view']);
This makes sure the requests reach the News controller instead of
going directly to the Pages controller. The second $routes->get() line
routes URI’s with a slug to the show() method in the News controller.
Create News Controller
Create the new controller at app/Controllers/News.php.
<?php

namespace App\Controllers;

use App\Models\NewsModel;

class News extends BaseController
{
    public function index()
    {
        $model = model(NewsModel::class);

        $data['news_list'] = $model->getNews();
    }

    public function show(?string $slug = null)
    {
        $model = model(NewsModel::class);

        $data['news'] = $model->getNews($slug);
    }
}
Looking at the code, you may see some similarity with the files we
created earlier. First, it extends BaseController that extends a core CodeIgniter class, Controller,
which provides a couple of helper methods, and makes sure that you have
access to the current Request and Response objects, as well as the
Logger class, for saving information to disk.
Next, there are two methods, one to view all news items, and one for a specific news item.
Next, the model() function is used to create the NewsModel instance.
This is a helper function. You can read more about it in Global Functions and Constants.
You could also write $model = new NewsModel();, if you don’t use it.
You can see that the $slug variable is passed to the model’s
method in the second method. The model is using this slug to identify the
news item to be returned.
Complete News::index() Method
Now the data is retrieved by the controller through our model, but
nothing is displayed yet. The next thing to do is, passing this data to
the views. Modify the index() method to look like this:
<?php

namespace App\Controllers;

use App\Models\NewsModel;

class News extends BaseController
{
    public function index()
    {
        $model = model(NewsModel::class);

        $data = [
            'news_list' => $model->getNews(),
            'title'     => 'News archive',
        ];

        return view('templates/header', $data)
            . view('news/index')
            . view('templates/footer');
    }

    // ...
}
The code above gets all news records from the model and assigns it to a
variable. The value for the title is also assigned to the $data['title']
element and all data is passed to the views. You now need to create a
view to render the news items.
Create news/index View File
Create app/Views/news/index.php and add the next piece of code.
<h2><?= esc($title) ?></h2>

<?php if ($news_list !== []): ?>

    <?php foreach ($news_list as $news_item): ?>

        <h3><?= esc($news_item['title']) ?></h3>

        <div class="main">
            <?= esc($news_item['body']) ?>
        </div>
        <p><a href="/news/<?= esc($news_item['slug'], 'url') ?>">View article</a></p>

    <?php endforeach ?>

<?php else: ?>

    <h3>No News</h3>

    <p>Unable to find any news for you.</p>

<?php endif ?>
Note
We are again using esc() to help prevent XSS attacks.
But this time we also passed “url” as a second parameter. That’s because
attack patterns are different depending on the context in which the output
is used.
Here, each news item is looped and displayed to the user. You can see we wrote our template in PHP mixed with HTML. If you prefer to use a template language, you can use CodeIgniter’s View Parser or a third party parser.
Complete News::show() Method
The news overview page is now done, but a page to display individual
news items is still absent. The model created earlier is made in such
a way that it can easily be used for this functionality. You only need to
add some code to the controller and create a new view. Go back to the
News controller and update the show() method with the following:
<?php

namespace App\Controllers;

use App\Models\NewsModel;
use CodeIgniter\Exceptions\PageNotFoundException;

class News extends BaseController
{
    // ...

    public function show(?string $slug = null)
    {
        $model = model(NewsModel::class);

        $data['news'] = $model->getNews($slug);

        if ($data['news'] === null) {
            throw new PageNotFoundException('Cannot find the news item: ' . $slug);
        }

        $data['title'] = $data['news']['title'];

        return view('templates/header', $data)
            . view('news/view')
            . view('templates/footer');
    }
}
Don’t forget to add use CodeIgniter\Exceptions\PageNotFoundException; to import
the PageNotFoundException class.
Instead of calling the getNews() method without a parameter, the
$slug variable is passed, so it will return the specific news item.
Create news/view View File
The only thing left to do is create the corresponding view at app/Views/news/view.php. Put the following code in this file.
<h2><?= esc($news['title']) ?></h2>
<p><?= esc($news['body']) ?></p>
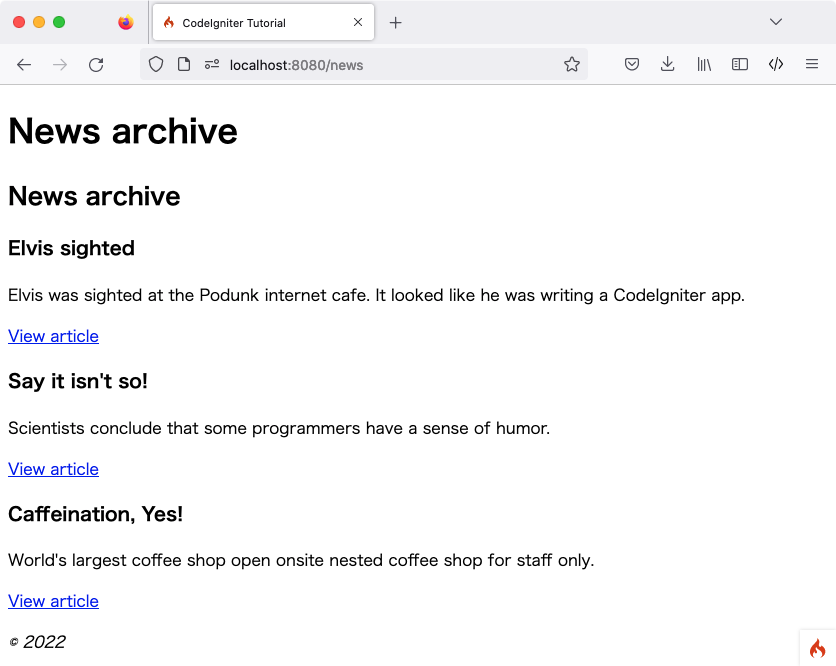
Point your browser to your “news” page, i.e., localhost:8080/news, you should see a list of the news items, each of which has a link to display just the one article.